Appearance
Create a New Content Project
You have a brand strategy and daily recommendations, but nothing happens until you open a blank canvas and start creating. Creating a new project is where Brand DNA transforms into shipping content.
The new project dialog guides you through template selection, variables, and brand voice alignment in three steps—setting up for AI-assisted generation instead of AI-powered guessing.
Step 1: Open the New Project Dialog
Option A: Use the keyboard shortcut Press Alt+N (Windows/Linux) or Control+N (Mac) from anywhere in the app.
Option B: Click the button Navigate to your Projects page and click Create New Project in the top right. The dialog opens immediately.
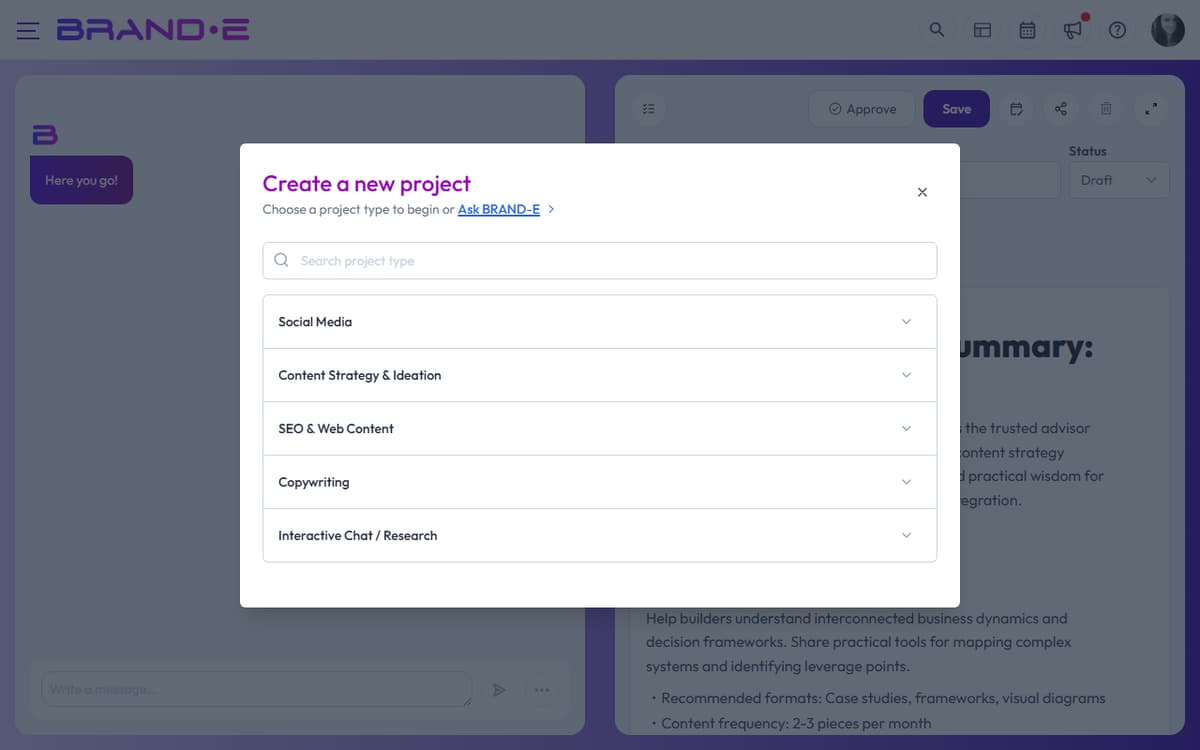
The dialog shows the title "Choose your project type" with a subtitle and a link to Ask Brande.ai (a template for custom content requests).
Step 2: Find Your Template
The new project dialog displays templates in three ways:
Search for a specific template: Type at least 3 characters in the search field. Results appear instantly. If no templates match, you'll see "{search term} project type not found."
Browse by category: Templates are grouped into categories: Content Strategy & Ideation, Copywriting, Social Media, SEO & Web Content, and Interactive Chat / Research (which includes Ask Brande.ai).
Click any category to expand and see available templates in that category.
Note: Some templates are locked behind plan upgrades. Hover over a locked template to see the tooltip "Upgrade your plan to access this template".
Step 3: Select a Template
Click the template you want. The dialog closes and the variables dialog opens immediately (unless you're in trial mode, in which case you'll see "You can't access this feature during trial period").
The template you selected is now ready for configuration.
Step 4: Configure Template Variables and Brand Settings
The variables dialog shows:
- The template name as the heading
- A brief description of what you're creating
- Input fields for template-specific variables (e.g., topic, audience, main point)
- Optional settings like Include images, Source Material, Folder, and Brand Voice
Configure variables: Fill in each required field (marked with an asterisk or validation rule). These provide Brand DNA context to the AI for generation.
Select Brand Voice (if available for your template): Use the Brand Voice dropdown to choose which voice profile to use. Your selection appears in the button label. Content generated will match that voice's tone and personality.
Include images (if your template supports it): Check "Include images" to generate accompanying visuals. If enabled, an Image Instructions text area appears below.
Add image instructions (when enabled): Describe the visual style, composition, or subject matter you want. Example: "Bold, flat design with bright colors and modern sans-serif typography." Leave blank to use default image generation based on Brand DNA.
Choose reference material (if needed): Some templates allow you to select source material or previous projects to reference for context.
Select a folder: Choose an existing folder or type a new folder name to organize your project in the sidebar.
Step 5: Start Creating
Click Done to create the project. The editor opens with a chat interface where you can start conversing with the AI to generate and refine content.
Your project is now saved with a Planning status (default). You can change the status manually anytime.
Tips for Best Results
Tip 1: Fill variables thoughtfully Template variables are placeholders for brand context. Specific, detailed inputs produce more aligned content than generic answers.
Tip 2: Match the template to your goal Choose the template whose format matches your output goal. Website Copy templates generate structured website sections; LinkedIn Post templates generate short-form social content.
Tip 3: Use Brand Voice to enforce consistency If you manage multiple voices within one brand, always select the appropriate voice before generating. This prevents voice blending across projects.
Tip 4: Plan folder structure early As you create more projects, organize them into folders by campaign, channel, or date. This makes finding past work and collaborating with team members easier.
Tip 5: Save images with intent If your template supports images, use Image Instructions to specify visual alignment with your brand identity. Generic image instructions produce generic visuals.