Appearance
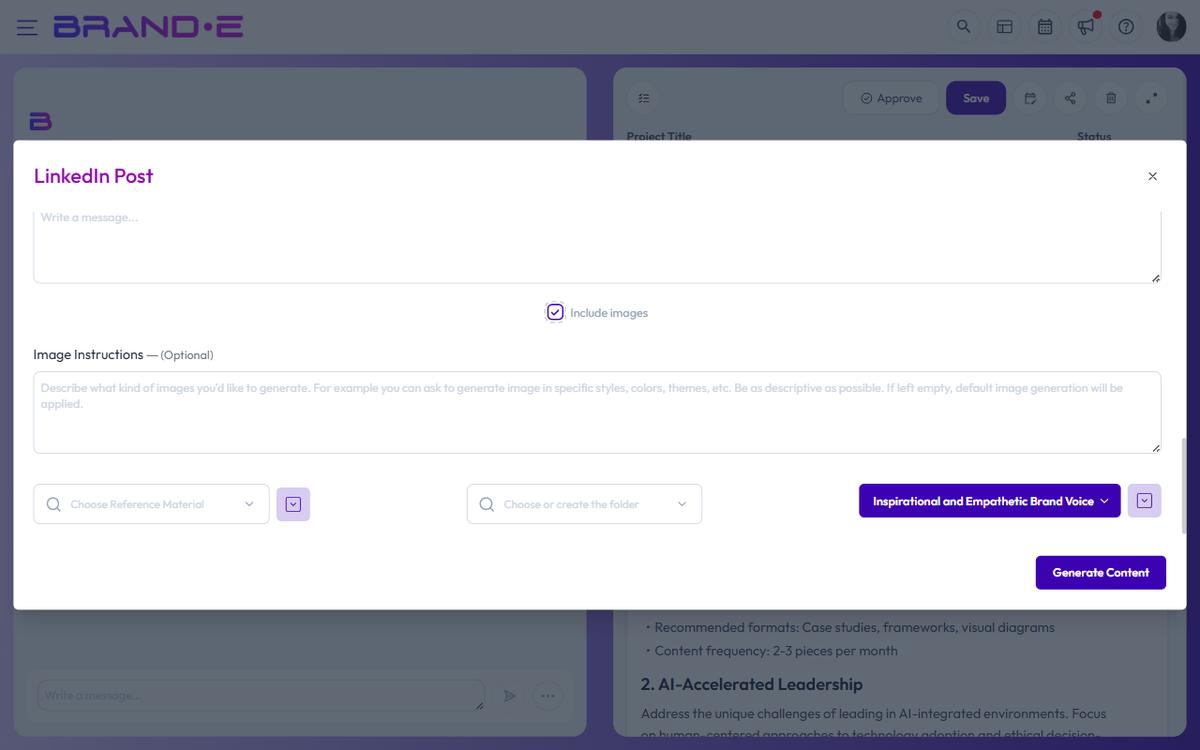
Include Images When Generating Content
Words are your argument. Images are your first impression. Brand-aligned images that match your Brand DNA stop the scroll, establish credibility, and increase engagement by 40%+. Brande.ai generates images alongside content when you enable the checkbox—no separate design tool, no back-and-forth with designers.
When to Use Image Generation
Use images for:
- Website pages (hero images, feature graphics, section headers)
- Social media posts (LinkedIn graphics, visual backgrounds, supporting images)
- Blog post featured images
- Email campaign header images
- Presentation or deck slides
- Landing page hero sections
- Case study or customer story visuals
Limit images when:
- You're creating internal documentation
- Your channel doesn't support images (email plain text, some messaging platforms)
- Your brand identity is text-only or minimal design
Which Templates Support Images
Image generation is available on templates with supportsImages enabled:
- Website Copy
- LinkedIn Post
- Long-Form Content
- Repurpose Content
- Ideation
Availability may vary by subscription plan. Check your template details.
Step 1: Enable Image Generation
In the New Project variables dialog:
- Look for the checkbox "Include images" (only visible if your template supports it)
- Check the box to enable
- An Image Instructions text area appears below
Step 2: Write Clear Image Instructions
Image Instructions tell the AI how you want your visuals to look. Be descriptive and specific.
What to Include in Image Instructions
Visual Style:
- Modern and minimalist
- Bold and energetic
- Corporate and formal
- Playful and creative
- Dark and moody
- Bright and clean
Color Palette:
- Your brand colors (specify hex or names)
- Example: "Use blues (#0066ff) and whites with accent oranges"
- Or general: "Muted earth tones," "Vibrant primary colors"
Subject Matter:
- What should appear in the image
- Example: "Diverse professionals collaborating in a modern office"
- Or: "Close-up shot of hands typing on a keyboard"
- Or: "Flat design icons representing workflow steps"
Composition:
- Rule of thirds, centered, layered, side-by-side
- Example: "Left side shows a person; right side shows a laptop screen"
- Or: "Centered icon with space for text overlay"
Design Elements:
- Illustrations vs. photography
- Flat design vs. 3D
- With or without people
- Example: "Flat design illustrations, no photography," or "Real photography with natural lighting"
Avoid Generic Stock Photos:
- Specify "no generic stock photos" to prevent clichéd business images
- Example: "Authentic, real people in genuine work moments, not staged stock photo vibes"
Example Image Instructions
For a Website Hero: "Modern SaaS aesthetic. Laptop screen showing a dashboard on the left, a professional woman smiling on the right. Blues, grays, and white. Clean typography overlay. No stock photo vibes—authentic and professional."
For a LinkedIn Post: "Bold, flat design. Single centered icon representing 'strategy' or 'clarity.' Brand colors: blue and white. Minimalist, high contrast. Ready to use as a LinkedIn post background."
For a Blog Featured Image: "Warm, approachable design. Shows diverse founders (2–3 people) in casual collaboration. Muted warm colors: beiges, warm grays, soft oranges. Hand-drawn illustration style. Text overlay space at bottom."
For a Repurposed Social Content: "Simple, mobile-optimized graphic. Key stat or quote centered on gradient background. Brand colors dominant. Typography should be large and legible at 600px width."
Step 3: Generate Content + Images
Click Done. The AI generates:
- Your content in the editor
- Accompanying images based on your instructions
- Image placement suggestions (where in the content the image appears)
Image generation may take 30–60 seconds. You'll see placeholder containers until images are ready.
Step 4: Review and Edit Images
Once images are generated:
- View in context — See images within the content blocks
- Judge alignment — Do they match your Brand DNA visual identity?
- Adjust instructions if needed — Use chat to refine: "Make the colors more vibrant" or "Replace this with a more serious tone"
- Regenerate — Request new images if they miss the mark
Chat requests for image refinement:
- "Generate a new hero image with a different composition"
- "Make the colors warmer—too cool right now"
- "The illustration style is too cartoony; make it more professional"
- "Add more people to this image; currently feels empty"
The AI regenerates images while keeping your content text intact.
Step 5: Download or Export Images
Export content + images together:
- Use the Export menu to download as PDF or Word
- Images embed in the export automatically
Download images separately:
- Right-click on any image in the editor
- Select "Save image as"
- Choose your download folder
Copy images to other tools:
- Right-click the image
- Select "Copy image"
- Paste into Figma, Canva, your CMS, or social media platform
Step 6: Use in Your Publishing Workflow
For website:
- Download the image
- Upload to your CMS alongside the content
- Set image alt text for accessibility
For social media:
- Download the image
- Upload to LinkedIn, Facebook, or other platform
- Pair with the generated content
For email:
- Download or embed directly
- Include in your email template
- Test rendering across email clients
For presentations:
- Download the image
- Insert into your deck or slide
- Resize or crop as needed for your layout
Image Generation Best Practices
Best Practice 1: Match visual style to audience B2B SaaS audience expects professional, clean design. Fitness brand expects energetic, bold colors. Coaching brand expects warm, approachable visuals.
Best Practice 2: Specify color palette upfront If you have brand colors, include them in Image Instructions. Example: "Primary: #1e40af (blue), Accent: #f59e0b (amber). Keep backgrounds light and neutral."
Best Practice 3: Avoid vague requests Vague: "Make it look professional" Specific: "Modern B2B aesthetic. Clean, minimal design. Blue and gray palette. No people. Focus on technology/data visualization."
Best Practice 4: One image per key section For website copy, generate 1 hero image + 1–2 supporting images for feature sections. More images = slower load times. Be intentional.
Best Practice 5: Test images for mobile Website images should look good at mobile width (600px). Social images should be mobile-optimized. Mention this in Image Instructions: "Optimized for mobile viewing."
Best Practice 6: Regenerate if misaligned If the first set of images misses your Brand DNA, regenerate instead of trying to edit them. The AI learns from your feedback.
Troubleshooting Image Generation
"The images don't match my brand colors" → Regenerate with explicit hex codes. Example: "Primary color must be #003366 (navy blue)"
"The style is too cartoonish/realistic" → Request again: "Make this more professional/approachable" or specify design style: "flat design," "realistic photography," "hand-drawn illustration"
"The composition is awkward" → Be more specific: "Laptop screen on left, person smiling on right" or "Centered icon with white space around it"
"Images don't appear in export" → Wait for all images to fully load before exporting (look for loading spinners). Export as PDF instead of Word for more reliable image embedding.
Image Instructions Template
Copy this template and fill it for your project:
Visual Style: [Modern/Bold/Corporate/Playful/etc.]
Color Palette: [Brand colors and supporting colors]
Subject Matter: [What should appear in the image]
Composition: [How should elements be arranged]
Design Type: [Illustration/Photography/Mix/Icons]
Special Notes: [Anything specific to avoid or emphasize]