Appearance
View and Manage Content Calendar
Your content calendar is where strategy becomes schedule.
Drag projects onto dates, set publishing deadlines, view your content plan in weekly/monthly/quarterly views, and stay on track without context-switching to external tools.
Access the Content Calendar
Option A: From Dashboard
- Log in and view the dashboard
- Scroll to the Content Calendar Widget
- The calendar is visible immediately
Option B: From Sidebar Navigation
- Open the sidebar (Ctrl/Alt+S or click menu icon)
- Look for Content Calendar or Calendar link
- Click to open the full calendar page
Calendar Views
Switch between three view modes depending on your planning horizon:
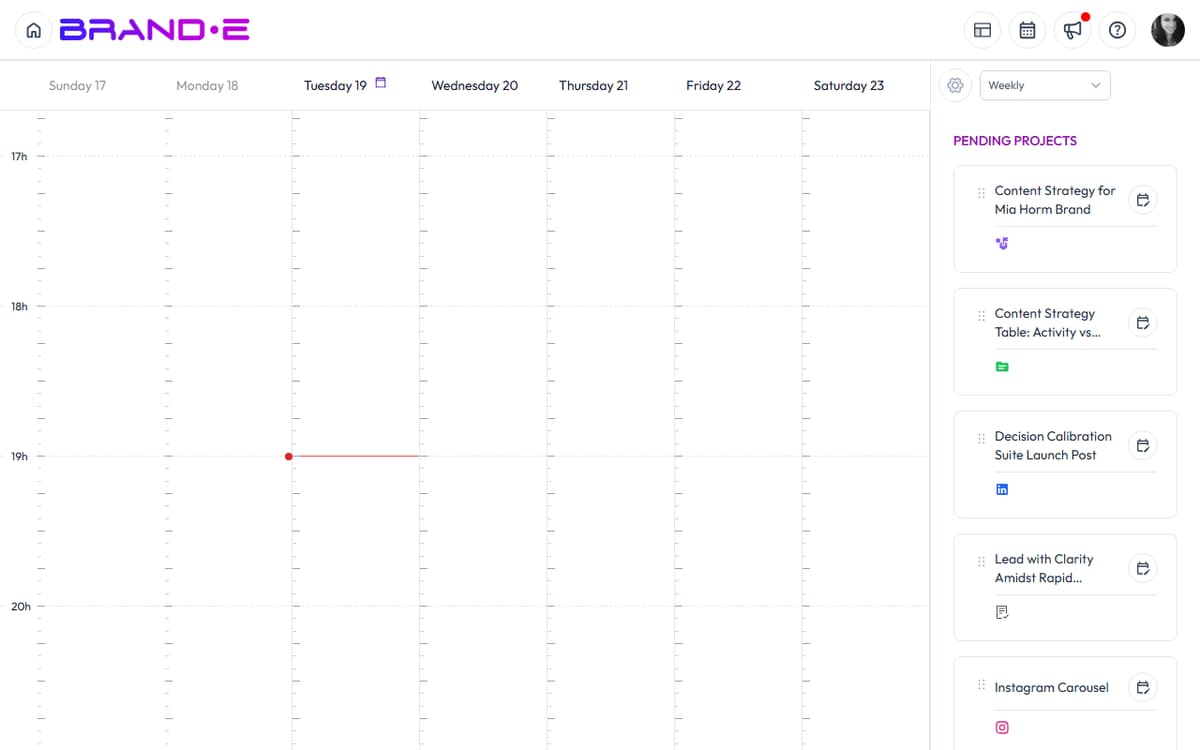
Weekly View
Shows one week at a time, broken down by day (Monday-Friday, or including weekends if enabled).
Best for:
- Daily task management
- Short-term deadline tracking
- Team coordination on who's doing what each day
- Week-by-week content planning
What you see:
- Projects scheduled for each day
- Time-based organization (morning, afternoon, evening if you've set work hours)
- Easy drag-and-drop to reschedule within the week
- Quick count of projects per day
Monthly View
Shows the entire month on one calendar, with projects labeled on their scheduled dates.
Best for:
- Monthly planning and overviews
- Identifying gaps and opportunities
- Campaign planning across 30 days
- Client reporting (shows full month at a glance)
What you see:
- All projects scheduled this month
- Projects labeled by date
- White space shows unscheduled days (gaps)
- Easy to spot patterns (e.g., "we're under-publishing on weekends")
Quarterly View
Shows three months at a time, condensed view with color coding by project status.
Best for:
- Roadmap planning
- Seasonal content strategy
- Long-term capacity planning
- Board-level reporting
What you see:
- All projects scheduled for the quarter
- Color coding by status (Planning = gray, In Progress = blue, etc.)
- Dense view highlights patterns and gaps
- Perfect for stepping back and seeing the big picture
Calendar Settings
Click the settings icon (gear or similar) to customize your calendar:
Hide Weekends
Toggle to remove Saturday and Sunday from view.
Why use this:
- Cleaner, work-focused view
- Reduces visual clutter if you don't publish on weekends
- Makes weekly view easier to scan
When to use:
- If your audience is primarily business-focused (weekdays only)
- If your team works 9-5 Monday-Friday
When NOT to use:
- If you publish lifestyle, consumer, or entertainment content (weekends are prime publishing time)
- If you publish across time zones (other regions may have different work weeks)
Open From
Set the start time for your work day (e.g., 9 AM).
Projects scheduled before this time appear in a separate section or are highlighted as off-hours.
Why use this:
- Prevents accidental scheduling at midnight or outside your team's availability
- Clarifies when content actually goes out
Close At
Set the end time for your work day (e.g., 6 PM).
Projects scheduled after this time appear in a separate section.
Why use this:
- Prevents over-scheduling
- Ensures rest time between workdays
- Clarifies publishing windows
Week Starts On
Choose whether Monday or Sunday is the first day of the week.
Why use this:
- Regional preference (US typically Monday, some countries use Sunday)
- Alignment with your team or client expectations
Pending Projects Area
Above the calendar, you see a Pending Projects section containing all projects not yet scheduled.
What this shows:
- All your created projects waiting for a scheduled date
- Project title, status, and sometimes a description
- Drag handles for easy dragging to calendar
Why it matters: Projects in Pending don't have a publish date. They're in-progress or waiting for a slot in your calendar.
As your pending list grows, you have two options:
- Schedule them — Drag to calendar or click "Add to Calendar"
- Archive them — Mark as completed, paused, or delete if no longer relevant
A large pending list signals that you're creating faster than you're scheduling, or that you need to review stale projects.
Scheduling Projects
Drag and Drop
- Find a pending project in the Pending Projects area (or an already-scheduled project)
- Click and hold the drag handle (usually dots or icon on the left)
- Drag the project onto a calendar date
- Release to schedule it for that date
The project moves from Pending to the calendar, now showing a scheduled date.
Add to Calendar Button
- Open a project (or view it in the Projects list)
- Click Add to Calendar button
- A date picker appears
- Select the date you want to schedule for
- Click Confirm or Schedule
The project is now scheduled for that date.
Calendar Context Menu
There is no right-click context menu in the current calendar. To schedule a new project on a specific date, use the project's Add to Calendar button or drag a pending project from the sidebar into the date cell.
Rescheduling Projects
Once scheduled, move projects to new dates:
- Click and drag the project to a new date
- Release to reschedule
Or:
- Click the project to open it
- Click the date field or "Reschedule" button
- Pick a new date
- Confirm
The calendar updates immediately.
Tip: Rescheduling is helpful when:
- You need to shift content due to client feedback
- You're over-scheduled on a day
- A better date becomes available (e.g., an industry event)
- You're prioritizing urgent projects
Filtering and Searching
The Content Calendar today does not include built-in filters by status, channel, folder, or assignee, and there is no in-calendar search box. To narrow what you see:
- Switch brands using the brand switcher to scope the calendar to a single client
- Use the Project Search modal (Modifier+Shift+P) to find a specific project, then click through to it
- Use folder structure to keep brand work segmented
For reference, filter dimensions that the team has discussed (but are not yet shipped):
- By Status — Show only Planning, In Progress, Published, etc.
- By Channel — Show only LinkedIn, Blog, Email projects
- By Folder — Show only projects from a specific folder
- By Team Member — Show only projects assigned to a specific person
If these filters exist, use them to:
- Find all projects pending approval
- See which channels have coverage
- Identify who's assigned what
Publishing Date vs. Creation Date
Creation Date: When you created the project
Scheduled/Publishing Date: When you plan to publish or review the project
These are different. A project may be created on March 10 but scheduled for publication on March 27.
The calendar shows the scheduled date, not the creation date.
This is intentional—the calendar helps you plan your publishing schedule, not your creation schedule.
Best Practices for Calendar Management
Weekly Planning Session Every Monday morning:
- View calendar in Weekly view
- Check pending projects
- Drag projects to specific days
- Assign any projects requiring team member approval
- Identify gaps (days with no content) and fill them
Balance Across Channels If you publish to multiple channels, use monthly view to check distribution:
- Are you publishing 3x/week on LinkedIn?
- Are you publishing 2x/month on Blog?
- Are you under-utilizing Email?
Balance according to your content strategy.
Respect Your Capacity If you or your team can create 5 projects per week:
- Don't schedule 7 projects for one week
- Distribute them evenly
- Plan buffer time for revisions and approvals
Over-scheduling leads to quality drop and team burnout.
Mark Completed Projects When you publish a project, mark it as Published or Completed. This keeps your calendar accurate and shows progress.
Communicate Dates to Team If team members are involved:
- Share the calendar view weekly
- Flag projects due for review
- Highlight any schedule changes
- Use calendar as the source of truth for deadlines
Plan Quarterly Every quarter, view your calendar in Quarterly view:
- Are there seasonal gaps (winter slower than summer)?
- Do you need more content during peak seasons?
- Is capacity growing or shrinking?
Use this insight for next quarter's planning.
Troubleshooting
Q: I can't drag projects to the calendar. A: Make sure you're clicking the drag handle (usually a special icon or area), not the project name. Some projects may be locked or archived.
Q: The calendar shows projects from other brands. A: If you're managing multiple brands, make sure you've selected the right brand in the profile dropdown. The calendar should only show projects from the currently selected brand.
Q: How do I delete a scheduled project? A: Open the project and use the toolbar's delete action. Deleting the project removes it from the calendar entirely. To keep the project but unschedule it, clear the publish date instead.
Q: Can I print or export the calendar? A: There is no built-in calendar export today. To share the schedule, take a screenshot of the relevant week or month, or copy project rows from the Projects list to a spreadsheet.
Q: What if I schedule something for the past? A: The calendar does not block backdating — you can drag a project to a past date or create an event on a past slot. Past dates are dimmed visually but otherwise behave normally. Use this deliberately to log work that already shipped, but avoid accidental backdating when you mean "today".