Appearance
Access and Update Account Settings
Your account settings control your profile, preferences, and workspace configuration.
All settings are in one place—your Account page—accessible instantly via keyboard shortcut.
Open Your Account Page
Option A: Profile Icon Dropdown (Fastest)
- Click your profile icon (top right corner)
- Select Account from the dropdown menu
- Account page loads
Option B: Sidebar Navigation
- Open the sidebar (Alt+S / Ctrl+S on Mac, or click menu icon)
- Click Account
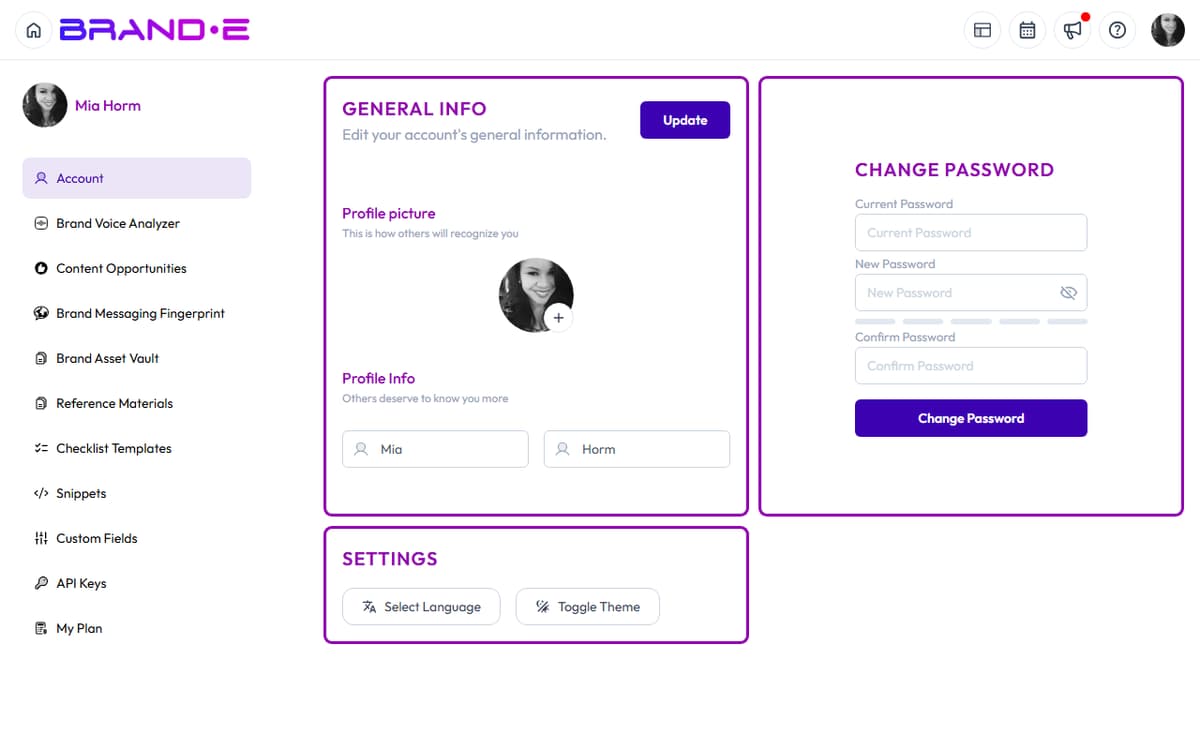
General Info Section
This is your profile information visible to team members and in approvals.
Navigate to: Account > Account (or General Info)
Update Your Profile Picture
In the Profile picture section:
- Click the picture area or Upload button
- Select an image file from your computer (PNG, JPG, or similar)
- The image is cropped to a square
- Click Save or Confirm
Your new profile picture appears:
- Next to your name in projects and approvals
- In the profile icon dropdown (top right)
- In team member lists (if you're on an agency plan)
Tips:
- Use a professional headshot or branded avatar
- Avoid very large files (keep under 5 MB)
- Ensure the image is square or nearly square for best results
Update First Name
- Locate the First Name field
- Clear the current name (or leave it if correct)
- Type your first name
- Click Update button
Your first name appears on your profile and in team interactions.
Update Last Name
- Locate the Last Name field
- Clear the current name (or leave it if correct)
- Type your last name
- Click Update button
Your last name appears on your profile and in team interactions.
Save Changes
After editing your profile picture, first name, or last name:
- Click the Update button
- Success message: "Profile updated successfully" (or similar)
Changes are saved immediately.
What Information Is Visible to Others
When you invite team members or collaborate with clients, they see:
- Your profile picture
- Your first and last name
- Your role (if assigned)
They do NOT see:
- Your email address (unless you explicitly share it)
- Your password
- Your API keys
- Your subscription plan or billing information
- Your account creation date
Password Management
See Change Your Password for detailed instructions on updating your password.
Theme and Language
See Update Theme and Language Preferences for detailed instructions.
Navigate to: Account > Settings
Language:
- Click the Language dropdown
- Select EN (English) or ES (Spanish)
- The interface switches language immediately
Theme:
- Click Toggle Theme button
- Switch between light mode and dark mode
- Your preference is saved automatically
Managing Your Plan
Navigate to: Account > My Plan
View your current subscription:
- Plan name (Starter, Pro, Agency)
- Renewal date
- Features included at your plan level
- Upgrade option
Click Upgrade Now to see higher-tier plans.
Click Manage Billing to update your payment method or view invoices.
Brands You Own or Access
Navigate to: Account > Brands
This lists all brands you own or have been invited to collaborate on.
For each brand:
- Brand name
- Crown icon (indicates you own it)
- Your role (Owner, Admin, Collaborator)
- Number of team members
- Options to manage, leave, or switch to that brand
If you're on a solo plan, you see one brand. If you're on an Agency Plan, you may see many brands.